By far, the most popular type of test run amongst RedLine13 customers are JMeter tests. To run a JMeter test on RedLine13 you will need to have prepared a JMeter test plan.
Getting Started
To run a JMeter test on RedLine13, begin by logging into your account, clicking on “Start Test“, and then navigating to the “JMeter” tab:

Running Your First JMeter Test
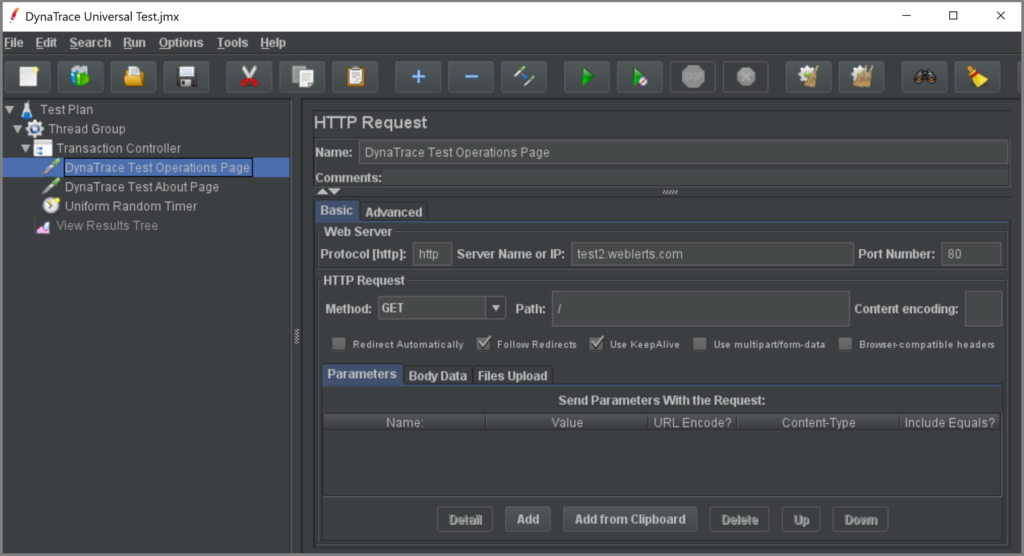
The most important prerequisite for this test type is to have a JMeter test prepared beforehand. This is most conveniently prepared by launching the JMeter application in GUI mode:

Once you have your JMeter test plan (JMX file) debugged locally you will need to upload and configure your test on RedLine13:

- Upload your JMeter test to RedLine13.
- Specify the number of load generator servers you wish to run your test from.
- Select the version of JMeter you used to create your test plan (or accept the latest version as default).
- Upload any attachments (e.g., CSV files) as “Extra Files“.
- Click on “Start Test“.
Viewing Results for Your Test
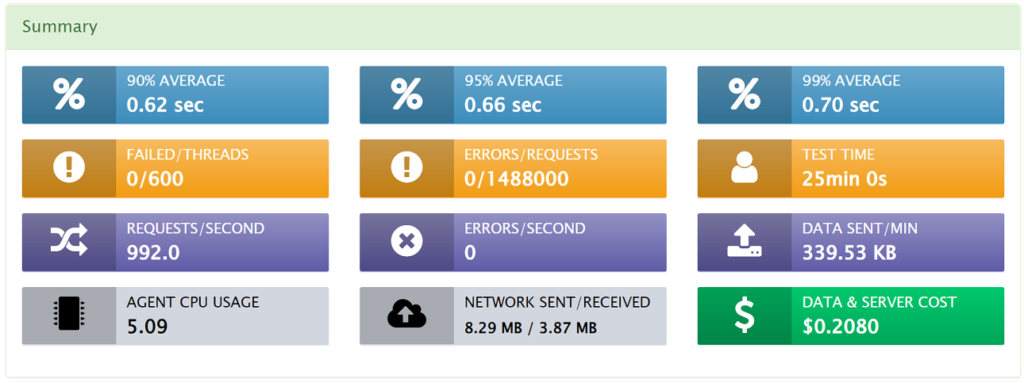
As your test begins, real time results will be displayed on the load test results page. These tables and graphs will update and finalize at the conclusion of your test. In addition to this, a test summary will be displayed after your test completes containing the most pertinent test information. Below is an example which is also covered in our documentation in more detail under “Test Summary“:

Field Descriptions
| Field | Description |
| JMX File | This is where you can upload your JMeter Test Plan (*.jmx file). This file is created when you save a load test created using the JMeter application. |
| Number of Servers | This will be the number of load agents (i.e., servers in AWS running your test plan). Each server will run your test plan in parallel. |
| JMeter Version | Select the version of JMeter that you used to create your test. This will be the version of JMeter that each load generator will use to run your test plan. |
CSV Data and Compressed Archives in Extra Files
Any custom load test supports extra files, with CSV files and compressed archive having special context. When a CSV file is uploaded, there is an option to “split” that file across all load generators. This works by dividing the file as evenly as possible (by whole line) with each load generator getting a different fragment of the file.
Compressed files (*.tar, *.tar.gz, and *.tgz) can either be uploaded in their compressed form, or marked to be expanded after being uploaded to each load generator.
Save Response Output and Calculate Percentiles
You may notice a checkbox option when running your JMeter test that is labeled “Save Response Output and Calculate Percentiles“. If you tick this box, our systems will collect and store log files for your test, as well as JTL files, and create the JMeter Dashboard Report. In addition, we will also parse your load test data to calculate and display percentiles information.

Advanced Cloud Options
This section will be available when you have integrated with AWS. Though AWS integration with RedLine13 is not required, it unlocks the greatest potential for scaling your load tests. The default instance size for load generators is m3.medium, and if no other configuration changes are needed beyond AWS defaults within your account this may suit your testing needs just fine. However you can fine tune load generator server type and properties to best match your test plan requirements. This will enable you to run your load test with maximal cost efficiency and also ensure that each load generator has the proper resources it needs to execute your test. A survey of the most pertinent advanced cloud options fields is as follows:
| Field | Description |
| Location | The options listed here correspond to AWS regions where your load generators will originate from. This field is required (with the default being US-East-1) however multiple regions can be configured for the same test, if desired. |
| Number of Servers | This will be the number of load agents (i.e., servers in AWS running your test plan). Each server will run your test plan in parallel. If this setting is changed here, it will also be updated above under the general test options. |
| Size | This is the AWS EC2 virtual machine size (with the default value being m3.medium). You can select a larger or smaller instance size to adjust for required capability for your test. |
| Disk Size | Each load generator is a virtual machine with a logical disk. The default disk size is 16GB and depending on the requirements of your test you may need to increase this size. |
| Subnet ID | If the load generator EC2 instance requires a subnet to be specified, you can select it from this drop down list. |
| Security Group ID | If your test requires a custom security group to be specified, you can do so using this field. |
Advanced JMeter Test Options
To further enhance the configurability of your load tests, we extend several advanced options under the “Advanced JMeter Test Options” section when starting your test.
| Field | Description |
| Option String | Anything specified in this field will be appended to the JMeter command line on each of your load agents when launching your load test. One of the most common use cases is to specify command line key-value pairs (using the -JKey=value convention). |
| JVM_ARGS | This field can be used to configure the Java Virtual Machine (JVM) environment. A popular use case for RedLine13 testers is to modify memory allocation (using –Xms and –Xmx arguments). However, this is usually unnecessary as our system selects optimal memory allocation based on the EC2 instance size. |
| user.properties file | If you have a common set of JMeter properties that you frequently set, you can use the user.properties feature to populate these from a local file on your machine. |
JMeter Plugin Support
We offer support for a wide variety of JMeter plugins. In fact, any JMeter plugin that is publicly available from JMeter-Plugins.org is directly supported on RedLine13. Custom third-party plugins can also be supported by uploading the *.jar file with your load test.
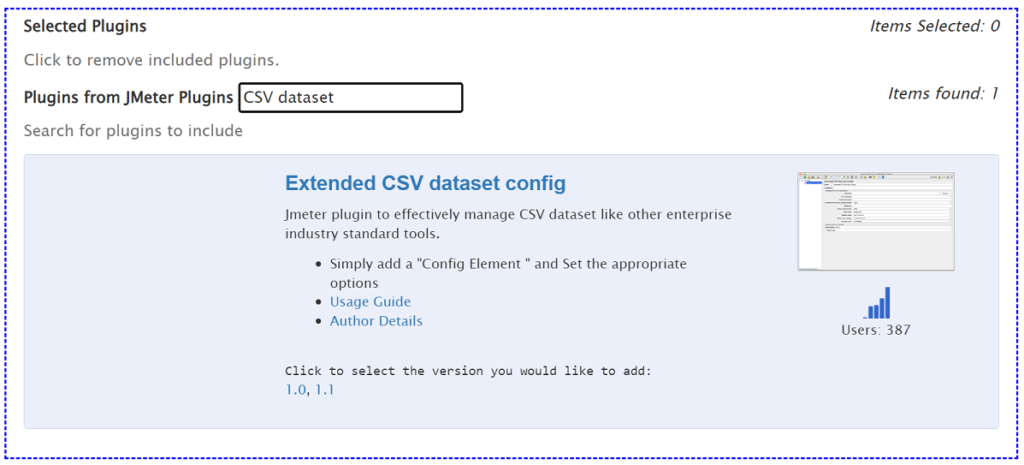
Support for many popular plugins is enabled by default when starting new load tests, and includes “Standard“, “Extras“, and “Extras Libs” packages. To enable automatic detection and installation of any publicly accessible plugin as described above, simply select the “JMeter Plugin Manager” when starting your test:

We have a tutorial published here on our blog which walks through how to utilize this feature. Using this same plugin, you can also search for and specify a specific version of a plugin, if necessary:

